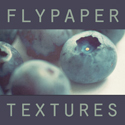
In this first tutorial of what we hope will be a continuing series, I'll show you how to easily transform a photo by adding our Flypaper Textures. Mouseover to see the transformation.
The original photo is nice enough, but I thought texture would add more depth and interest.
First thing to do is duplicate your background.
I opened my Flypaper Texture folder and decided that pompeii stucco might be the best one to try first. Choosing which texture goes with each photo is something you learn with practice and experience as texturing is not a "one size fit's all" kind of thing.
Open the texture in photoshop (or your editing programme) then with the move tool selected drag it from the layers palette on top of your image. It doesn't matter if the texture is a different size or shape from your photo, you just resize to fit by using the drag handles on the corners.
Once your texture is covering your image, have a play with the blending modes and opacities.
Here is my texture at Soft light blending mode and 100% opacity
It looks okay but lacks depth, so I had a play with several different textures, you'll find when you're using texture that your delete button will be your best friend as you try out combinations.
Anyway, I finally hit upon using our Bruised Saffron texture at multiply and 37%
Then another layer of Pompeii Stucco at soft light 37%
Almost done, but the colours need a bit of a tweak. So I added an curves adjustment layer by clicking on "Create new fill or adjustment layer" button at the bottom of your layers pallete and selecting curves from the drop down list.
Once the dialogue box opens I played with red, green and blue curves until I got the tone I wanted. A little goes a long way with curves so it pays to be gentle.
And voila! We're done!
And just so you can see a bit better the effect that the texture has had, here's a close-up showing some of the detail.
Of course with different texture choices and opacities it would be quite a different photo, so just treat this is a guide.
Any questions or suggestions for future tutorials, drop us a line, or leave a comment.






 Posts
Posts