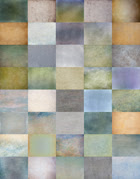
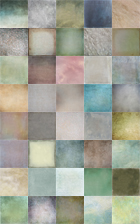
I was emailed a few weeks ago, asking how to create a mist effect
with textures. My tardy answer is now shown here (sorry Bob!)
This image was captured on the mountains last January.
I'd not used these particular images because although I shot them in raw, It still had blown out areas.
However, with our new textures it came to me just last night, a bit of a revelation! - Don't bother hiding the blow-outs, simply lighten and texture the rest of the image! :-)
Necropolis is still my all time personal favorite texture, but these days I tend to use a tweaked version. Just the other day, you might recall,
I used a dark green version?
You can create your own easily by following this tip:
With the aid of the Colour sliders at the top in photoshop I turned this texture to a dark indigo colour with the slider pushed all the way to the right. I then save and use like a new texture, the beauty of this new texture are - no warm/brown tones!
How to:
Top of Photoshop - Image - Adjustments - Hue/Saturation -
Hue @ +180
Saturation @-28
Lightness @ -23
Save this Texture and name it 'Necropolis Indigo' for future tutorials!
Here's my texture recipe
Necropolis (turned into an indigo blue as discussed) Opacity - Soft Light @ 89%
Necropolis (indigo blue), used on blown out highlights at the top only) Opacity - Color Burn @ 8%
Apple Blush - Opacity - Overlay @ 68%
At this point something wasn't quite right, the sky colour didn't really blend with the picture. So I flattened all my layers and started with a second onslaught of texture! This time from Tex Box Two.
If you look at the base image you'll see the bottom of the image is very dark with no mist, it wasn't really working.
So I pulled out the 'Leaden Hall' texture - don't ask me why I thought this might work - I was lucky!
I flipped this texture vertically and so the pale part was at the bottom. The Skirt at the top was pulled above the picture top and cut off.
To create the extra fog and pull together, I simply turned this Leaden Hall texture to - Opacity - Screen @ 61%
I blurred it a little and I also changed this layer to B/W and changed the colour to a green/blue with the top sliders.
I then removed the top half of the texture with a very soft eraser brush, used selectively.
Last finishing texture was:
Chlorophyll Opacity - Soft Light @ 57%
Used to just add a slight vignette at the edges.
Further colour tweaks to finish.
Combo Pack Offer
Only $65 for Both texture Packs!


1 comments:
Thanks Paul...can't wait to try this out on a suitable photo.
Post a Comment
Note: Only a member of this blog may post a comment.