FINE TEXTURES AND PHOTOGRAPHIC OVERLAYS TO ENHANCE YOUR PHOTOGRAPHY AND MORE


Tuesday, March 30, 2010

Into the Light


I love these climbing hydrangea flowers, although they're dead, they're still delicate and beautiful, they're even better a little later in the season when they look like lacy butterflies. Unfortunately I don't have plant of my own but take photos of the one that grows at our local Botanic Gardens just a short walk from where I live. Last year there were lots of these wonderful dried flowers, but this year I've noticed that the plant has been pruned already so there are only a few of these left for me to photograph, fingers crossed they don't cut it back even more.

See it on  Flickr

Okay, on to the processing, I did toy with using one of the new textures we've been working on, the one I tried looked wonderful on this image too, but changed my mind and used a texture from each of the current packs, including one I haven't used as often as I should namely Basalt, although it's a dark looking texture, this doesn't come out in the photo.

Basalt @ soft light 100%
Dark blue colour layer @ exclusion 37%
Grosgrain @ Screen 10%
Then I decided to add some drama, so using a sun burst brush I enhanced the flare in the corner (this was done on a new layer)
Then it was just a matter of a a curves layer, and a copy of the background @ Soft Light 50% and it was done
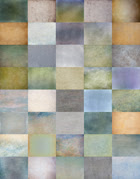
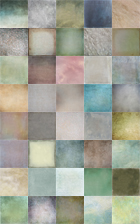
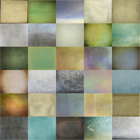
Combo Pack Offer
Only $65 for Both texture Packs!

Add to Cart

Monday, March 29, 2010

Flypaper Tex Box Two !

Winter season
Following on the success of Tex Box One we're back with a new pack!
It contains 30 large, professional quality, high resolution textures ranging from the subtle to the grunge.
Over the past several weeks we've had the pleasure of your feedback and have tailored this new pack to our clients needs.
They are smoother, lighter and have more vignettes. There are also clouds (for Bob!) and interesting antique wall textures.
The colours are clearer, following on from the huge hit of 'Apple Blush', we've added several more textural fruit goodies!
This winter collection is also going to be easier to use with darker/lighter images.
The original Tex Box One is still going to be an essential base, we hope you'll have both ready as we'll continue to show use with both!

Still only US $35 for a download.
All our textures can be used in  any editing programme that supports the use of  layers,  Photoshop, Photoshop Elements,  Gimp etc 

For downloads click the Add to Cart button, a download code will be sent to you on payment. 
Buy Tex Box Two
Add to Cart
(Please note the file is over 200mb in size so the download may take a while)
Those on very slow connections may prefer to purchase the textures on CD, please get in touch for details.
Flypaper Combo Offer 
Buy Tex Box One and Two 
For only $65
Add to Cart

The 30 Textures included in Pack Two are:
Algae, Antiquity Scroll, Archival Canvas, Backdrop, Basalt, Beowulf, Burnished Clay, Chlorophyll, Colosseum Sienna, Concorde, Cyprus haze, Gooseberry, Holmes, Icarus Haze, Labyrinth, Lavender Skies, Leaden Hall, Lime Plaster, Lost Void, Luminescent, Marie Antoinette, Ming, Muscatel, Ordinance Map, Paua Nacra, Peach Blush, Rainbow Trout, Sail Cloth, Sunflower Sky and Voyageur Map

Saturday, March 27, 2010

Cherry Blossoms


This is a simple version of the desaturated Cherry Blossom image
I have up on Flickr. I'm not showing the full version's recipe because
it incorporates a new texture from the upcoming pack!
We hope to complete the new pack soon, so please watch this space!

To get this look, I first polarized the sky, to make it darker, which has already been done to the base image above, then used:

Lime plaster - Hard Light @ 97%
To remove the darker base section, simply pull the texture lower than the image and crop.

Combo Pack Offer
Only $65 for Both texture Packs!

Add to Cart

Tuesday, March 23, 2010

Dream Beach


This is a view towards the wonderful white limestone cliffs at the end  of  Napenape beach near Cheviot in Canterbury. When we were there it was all but deserted, apart from a woman surf-casting and a small cluster of caravans used by fishermen there wasn't a soul in site.   The beach is made up of small loose pebbles interspersed with larger limestone rocks and we certainly got a workout on our walk -it was one of those two steps forward, one backwards type of beaches :-)

This was processed relatively easily and I used another texture which strangely I have rarely used (though I've seen lots of other people using it to good effect)  namely Sunflower skies. I tend to get in a bit of a rut with textures and use the same ones over and over. I'll definitely be using this combo again though, when I find the right photo.

Sunflower skies @ Overlay 54%
Antique Liasons @ Overlay 100 % blurred with a 4.4 Gaussian blur
Cream colour fill layer @ Soft light 46%
Soft Green colour fill layer @ hue 14 %
Then to tweak the tone I used a curves, levels, and finally a selective colour layer.

Combo Pack Offer
Only $65 for Both texture Packs!

Add to Cart

Friday, March 19, 2010

Make-over winner!


This week a texture contest came to an end over at our friends site; Elizabeth Halford.com. We'd like to thank all who entered and add that picking a winner was very difficult.
I think, finally it was the mist we liked in this winning farm scene by Christopher Miller featuring his own farmhouse/barn in the US.
Simply mouse-over to view his raw entry.

Processing blown-out skies is always a problem, what do you do?
This image is also very bottom heavy, so we tried to bring some balance, pulling it together with heavy texturing.

Normally texturing isn't as complicated as we're showing here, and also, we don't usually use as many textures, perhaps up to three is normal?
But I wasn't happy with my first attempt (see below) So I tried again, the result is the second yellow image below.
Finally, we decided we liked the atmosphere of the first, but loved the yellow glow of the second, so I simply merged to two images together!
The final result is the mouse-over image at the header.

I always process using Photoshop CS4, though any previous Photoshop would work just as well as the Elements edition.

First stage
Here is the recipe for the first base image:
Background copy 2 - Luminosity @ 28%
Background copy 3 (grass brushed away) - Color @ 100%
Apple Blush (center only) - Darker Color @ 30%
Dangerous Liaisons - Overlay @ 66%
Orient Express (blurred) - Soft Light @ 100%
Ming (desaturated) - Overlay @ 100%
Background copy 5 (grass brushed away) - Hue @ 100%
Background copy 4 (grass brushed away) - Color @ 45%
Labyrinth (hedge brushed away) Linear Burn @ 82%
Labyrinth (Desaturated, blurred, all darker base part of picture brushed away) Color @ 81%

first layers


The result, a washed out dark version


It needed more light so I did another version...

Here is the recipe for the second lighter version.
Background copy - Normal @ 100%
Background copy 2 - Luminosity @ 28%
Apple Blush (desaturated) - Multiply @ 33%
Dangerous Liaisons (full blur) - Hard Light @ 58%
Muscatel - Soft Light @ 31%
Labyrinth (Blurred, edges pulled away from the picture, using the pale inside part only) - Vivid Light @ 40%

2nd set


This is the result, a pale yellow version.


In this third, final stage I simply merged to two previous versions together as shown..
First base image - Normal @ 100%
2nd lighter version - Overlay @ 31 %

3rd set


Combo Pack Offer
Only $65 for Both texture Packs!

Add to Cart

Wednesday, March 17, 2010

The Sheep and the Rock


This was taken when I was away on holiday almost a month ago. We decided to explore some of the countryside around the little town of Cheviot where we were staying for a day or so and we ended up on a road leading high into the hills. It started as an ordinary country (gravel) road but soon turned into a grassy farm track and at times we wondered if we were lost, but after an hour or so of back road driving and many gates we came out where we were supposed to, at a valley on the other side of the hills.
Canterbury sheep seem to be much better trained than Otago ones, they stand still beautifully for photos and are very cooperative when it comes to composition too :-)

Now the processing....to start with I used Paul's painterly effect (the before version has already had the effect applied. Then it was texture time
Chlorophyll @ multiply 61% desaturated and the texture removed from the lower portion
Apple Blush @ Soft Light 51%
Necropolis @ Overlay 85% with much of the texture removed from the sky
Necropolis @ Soft Light 34% with the some of the texture removed from the land
Then after a final tweak of tone and contrast using levels and curves adjustments I called it done.

Combo Pack Offer
Only $65 for Both texture Packs!

Add to Cart

Monday, March 15, 2010

les visiteurs


Captured from the hip on my way up to the spectacular bell-view, previously photographed many times, next door to the cathedral,
which can just be glimpsed at the top, behind the end house.
I spent hours removing the electrical clutter, mostly from the right hand side of the lane and the horrible council bins behind the people.
This lane is normally littered with restaurant tables, I even once saw a rather 'merry' Mayor of London eating at this very same lane, I'm not saying which though!

I decided to paint over the couple and turn them into snappy silhouettes! I did this before adding these textures;

Raw Linen, (blurred) Vivid Light @ 34%
Caramel soft (blurred) Overlay @ 100%
Labyrinth (blurred) Soft Light @ 18%
Base Image copy - Luminosity @ 10%
Merge all.
To get the Blue/Green tones, I made a green version and a blue version, I merged together and thought, this needs more texture!
So, I added a final extra copy of:
Labyrinth - Overlay @ 87%

Combo Pack Offer
Only $65 for Both texture Packs!

Add to Cart

Friday, March 12, 2010

New Dawn


One from a while back when my roses were in full bloom, there are still some late season flowers but summer is gone for another year.
The soft pink of the New Dawn rose and a blue sponge-ware jug are a great combination in my eyes!
I decided to process this softly...I couldn't really do anything else.
Archival Canvas @ Soft light 68%
Peach Blush@ Hard Light 73 % desaturated slightly
Peach blush @ Colour Burn 40% with some of the texture removed from the focus flowers
Dark Blue colour layer @ Exclusion 70%
Curves layer to tweak tone etc.
See it on Flickr

Combo Pack Offer
Only $65 for Both texture Packs!

Add to Cart

Tuesday, March 9, 2010

Plums on white


A slightly different starting photo and slightly different processing.
I'm enjoying playing with photos in this soft desaturated style and have discovered after many failures that choice of subject and background are very important and likewise light, soft indirect light seems to give the best results.
After much playing with textures, I think I've come up with a winning combination:-)

I duplicated the background to start with.
Using a Hue Saturation layer I reduced the saturation a touch.
then:
Burnished Clay @ Hardlight 68%
Sail cloth @ Overlay 55%
Sail cloth @ screen 7% (this layer probably could have been omitted)
Gosgrain @ screen 54 % desaturated to taste. I started off having this layer toned blue to give the finished image a slight blue hue but changed my mind at the last moment and opted for just slightly desaturating the green of the texture. A touch of texture was removed from the focus fruit.

....and yes, that's a cup ring you see on the original background (a piece of cardboard), textures are so good at covering up such things :-)

The above processing is very similar to what I used on my recent stone and bowl image on flickr.

Combo Pack Offer
Only $65 for Both texture Packs!

Add to Cart

Sunday, March 7, 2010

the scary bit


On rediscovering my Thailand vacation pictures from last year,
I still find the odd thing to process.
This was shot in Portrait format, on a fast speedboat launch in poor early morning light, thus unfortunately most shots from this batch suffer from a little camera shake and were abandoned.
The rocks were very yellow, so to get around this, I simply added a final B/W base image layer to finish off the image.
It gives a cool modern look to the finished imagery.
I'm sure that if the James Bond franchise were to re-visit their famous nearby Kho Phi Phi islands used in 'The Man with the Golden Gun',
would they be using this kind of desaturated filming, perhaps with a green filter?

Apple Blush - Soft Light @ 100%
Dangerous Liaisons - Multiply @ 30%
Base Image - Soft Light @ 31%
Base Image (totally desaturated) - Normal @ 45%

If you look closely at the flickr version you'll see I removed a boat!

Combo Pack Offer
Only $65 for Both texture Packs!

Add to Cart

Thursday, March 4, 2010

Plums


We have a self sown plum tree in our garden it produces fairly tangy, yellow fleshed plums with dark purple skins, in fact they look a bit like the Grand Duke plums that grew in the orchard on the farm where I grew up. Unfortunately our tree doesn't crop very well so I try not to let the plums go to waste, after I'd taken these photos I turned the fruit into plum sauce. The recipe I use is one my grandmother used to make; don't you love old family recipes like this?.With these plums it makes a wonderful dark red, tangy sauce.

Grandma's Plum Sauce

6 lb plums (I remove the stones to make the sieving easier at the end)
2 lb onions
3 lb sugar
3 pints vinegar (I use malt vinegar)
1 tbsp ground ginger
2 tsp salt
2 tsp ground cloves
pinch of cayenne

Boil all together till soft, then put through a sieve or mouli/food mill. Bottle in clean hot jars.
Use as a condiment and also in cooking, it's great in marinades, casseroles etc.

Now the texture recipe!

Peach blush @ screen 35%
Backdrop @ multiply 72% desaturated to taste
Hue saturation layer remove most of the colour.
Dark blue colour layer @ screen 26%

Combo Pack Offer
Only $65 for Both texture Packs!

Add to Cart

Wednesday, March 3, 2010

hydrangea resting on a stool


Continuing in a pale Dutch mood, this image was post processed in almost the same simple way as the last pears image, but omitting the muscatel texture.
The stripped Stool is originally antique English country furniture.

Lime Plaster (flipped vertically) Hard Light @ 50%
Lime Plaster (flipped vertically and brushed from flowers) Hard Light @ 12%
Ming (slightly desaturated) Soft Light @ 100%
Base image copy - Soft Light 52%

Combo Pack Offer
Only $65 for Both texture Packs!

Add to Cart

Monday, March 1, 2010

The Road


This was taken while I was on holiday just last week on a very hot and dry North Canterbury day as we ventured high into the hills looking for a river. It's beautiful countryside with rolling brown hills, the occasional tree and white roads thanks to the local limestone. The river, when we found it was a wonderful blue but it was so hot down there in the sheltered and almost treeless valley that we didn't linger.

I had a lovely and relaxing holiday, the weather was perfect and I saw lots of new places, it's good to be back though :-)

After doing some rough cloning in of the sky to make my photo square, I processed this as follows using textures from both packs.
Peach Blush @ Colour Burn 23%
Leaden Hall @ Saturation 51% and removed a little from the sky (a strange choice of blending mode for this texture but it muted the colours subtly)
Necropolis @ Overlay 53% (desaturated a little)
Copy of background @ Overlay 20%
Pompeii Stucco @ Overlay 75% (this gave the vignette)
Muscatel @ Multiply 72 % desaturated and with the texture removed from the upper portions of the image using a graduated layer mask
Peach Blush @ Overlay 44% desaturated a little

Combo Pack Offer
Only $65 for Both texture Packs!

Add to Cart