Another wet day here so I decided to do a very basic tutorial on masking in photoshop. Using a mask is how I remove unwanted texture from parts of an image, it's a great way to do this as it's fully reversible and adjustable.
Mouseover the image above to see the before photo.
I started with a layer of Chlorophyll @ hard light 80%. It looked okay but the texture was covering the flower a bit too much. So I added a layer mask to that layer. Make sure your texture layer is selected, click on the mask button at the bottom of the layers palette and the white layer mask box appears beside the texture layer in the palette.
(click on the following screenshots for a bigger view)
Select a large soft brush, I used one of around 20 % opacity, and make sure your foreground and background colours are set to black and white -if you press "D" on the keyboard they will reset automatically.
You can toggle between black and white by pressing the "X" key.
Make sure your mask layer is active by clicking in the white square and with black as the brush colour, softly brush over parts of the image that you want to remove texture. If you make a mistake simply change the brush colour to white. Here is the flower after some texture removal.
On some subjects I use a graduated fill rather than a brush to remove the texture. Once again make sure your colours are set to black and white and that your mask is active. Select the gradient tool and the type of gradient - for this photo I would choose a a circular gradient. Then it's just a matter of drawing a line from the centre of your subject outwards to remove some of the texture. This can be redone until you get the effect you like. On landscapes I often use a linear gradient to remove texture from the sky (or the ground).
Next I added a couple more textures.
Archival Canvas @ multiply 62%
Fly edge 15 @ multiply 78 %
At this stage I decided that the Chlorophyll layer was a bit too green and dominant so I reduced its opacity to 43%
And finally added a levels adjustment to tweak the tone
Hope this has been helpful and as always if you have any questions don't hesitate to ask.
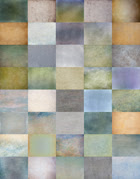
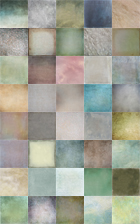
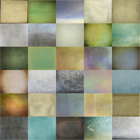
Don't forget our earlier packs...click on the sidebar links, the combo offer for packs One and Two is still running too :-)
Combo Pack Offer
Only $65 for Tex Box One and Two!
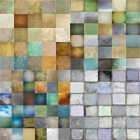
Fly Edges Pack
Only $40
Please note that this is big, almost 400 mb file so the download may take a while. Average reported download time for this pack varies from 15 to 20 mins.







6 comments:
I just put the mask tutorial to work on a lupine photo that my daughter took. I love the results- thank you for sharing your knowledge!
Thanks Lawatha, I'm so glad it's been helpful :-)
well, jill, this is a great service! :)
very helpful.
i will have a more detailed look into it as soon as i have more time and i will give myself a try.
thank you so much for this tutorial!!! :)
This was an awesome tutorial. I followed your instructions and it worked. It seems that using a mask to remove texture works so much better than using the eraser. It gives a much softer effect. Thanks so much! I can't wait for your next one!!
Thanks :-) I should add that you can alter the opacity of your brush to take off more or less texture and that this masking technique can be used for more than just texture, it can be used on any adjustment layer.
Superb tut Jill, cant wait to use it! :-)
Post a Comment
Note: Only a member of this blog may post a comment.