FINE TEXTURES AND PHOTOGRAPHIC OVERLAYS TO ENHANCE YOUR PHOTOGRAPHY AND MORE


Showing posts with label Man. Show all posts

Thursday, May 27, 2010

Watching


Paul is having connection problems at the moment so  yet another photo from me here and one with a human subject for a change :-)
This is the lovely Katiki beach adjacent to the  main highway north to Oamaru, it's a beautiful long golden beach and is one of the highlights of the drive north.
I did two versions of this photo,  the other is rectangular and deserted but has been processed in exactly the same way. You can see it on flickr Here

The processing once again was fairly simple.
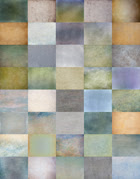
Necropolis @ Soft light 100%  toned slightly green and desaturated a little
Concorde @ Overlay 100% this texture has really accentuated the blue/green of the sea and given much of the softness.
Paua nacra @ overlay 100%
It looked okay at this stage but I decided to tone down the yellow a little so I added a Selective colour adjustment layer and tweaked the colours (neutrals and blacks)

Don't forget our earlier packs...click on the sidebar links, the combo offer for packs One and Two is still running too :-)

Combo Pack Offer
Only $65 for Tex Box One and Two!

Add to Cart


Fly Edges Pack
Only $40

Add to Cart

Please note that this is big, almost 400 mb file so the download may take a while. Average reported download time for this pack varies from 15 to 20 mins.

Tuesday, January 26, 2010

jetty shadows


After a bit of an Epiphany the other day about my last blog posting,
I decided to work on a cleaned up idealized version.
Purists might blanch, (and probably shouldn't be here anyway!) but I've merged two images together and removed the cluttering couple!
The council bin has also gone by simply cloning out, and thankfully the little guy was being held back by the tiny dog and thus was in a few shots, so I was able to use him and the original background with the 'Michelin Tyre' looking lady which I liked!

I referred to the recipe from before (thanks self!) but then thought,
Why Not? Can I add just one more without the whole thing sinking like an over-rich chocolate soufflé ? - Judge for yourselves!
Its Caramel soft, which I'd first desaturated, as the colors were already rich enough.
Here is the full revised recipe:

Orient Express ~ Opacity ~ Soft Light @ 53%
Colosseum Sienna (desaturated) ~ Opacity ~ Overlay @ 43%
Raw Linen ~ Opacity ~ Soft Light @ 100%
Caramel soft (desaturated) ~ Opacity ~ Soft Light @ 43%
Base image (color ramped up in curves) ~ Opacity ~ Soft Light @ 31%

Thursday, December 10, 2009

m e s s e n g e r


A dull afternoon on the beach found me on my knees trying to get a low level shot. Overcast days are perfect to try moody, grainy textures.
The idea behind this picture was 'a Message in a bottle', but from the bottles perspective!
The Lime Plaster somehow helps give that 'old distorted glass effect' .

Tex Pack Two textures were:
Lime Plaster ~ opacity ~ Overlay @ 27%
Lost Void ~ opacity ~ Overlay @ 100%
Lost Void flipped vertical ~ Opacity ~ Overlay @ 100%
Voyageur Map ~ opacity ~ Soft Light @ 97%
Ming ~ opacity ~ Overlay @ 100%
Ming's colour was changed to a Prussian blue with the Hue/Saturation sliders. The combination of Voyageur Map and Ming used here is a real winning combo!
Finally, as I'm all for an easy life, a new thing I've tried is to first re-size my images to 4000 x 4000 Pixels*.
This is the same size as the Flypaper textures. Thus simply enabling dropping of the same size on top of the base image, saving the laborious 'pushing and pulling' our textures into shape! :-)

*Changing to 4000 x 4000 pixels
Firstly, You need to crop your image square, then go to the top of the page and select Image - image size - width, change the top box to 4000 pixels
And make sure your resolution is 300 pixels/inch. Press save.
Its easy:-)